Tail Section
 The tail section remains mainly unchanged from V1. The vertical and horizontal stab are secured to the carbon fiber boom. The boom comes predrilled for this purpose.
 The tail servo gets wrapped and glued with a small amount of Gorilla Glue to to the vertical stab servo cover. Alignment is important here so take your time and make sure the servo horns can be removed easily.
The servo cables can be easily routed through thew bottom of the assembly.
At this point is important plan how to route the servo cables all the way to the front.

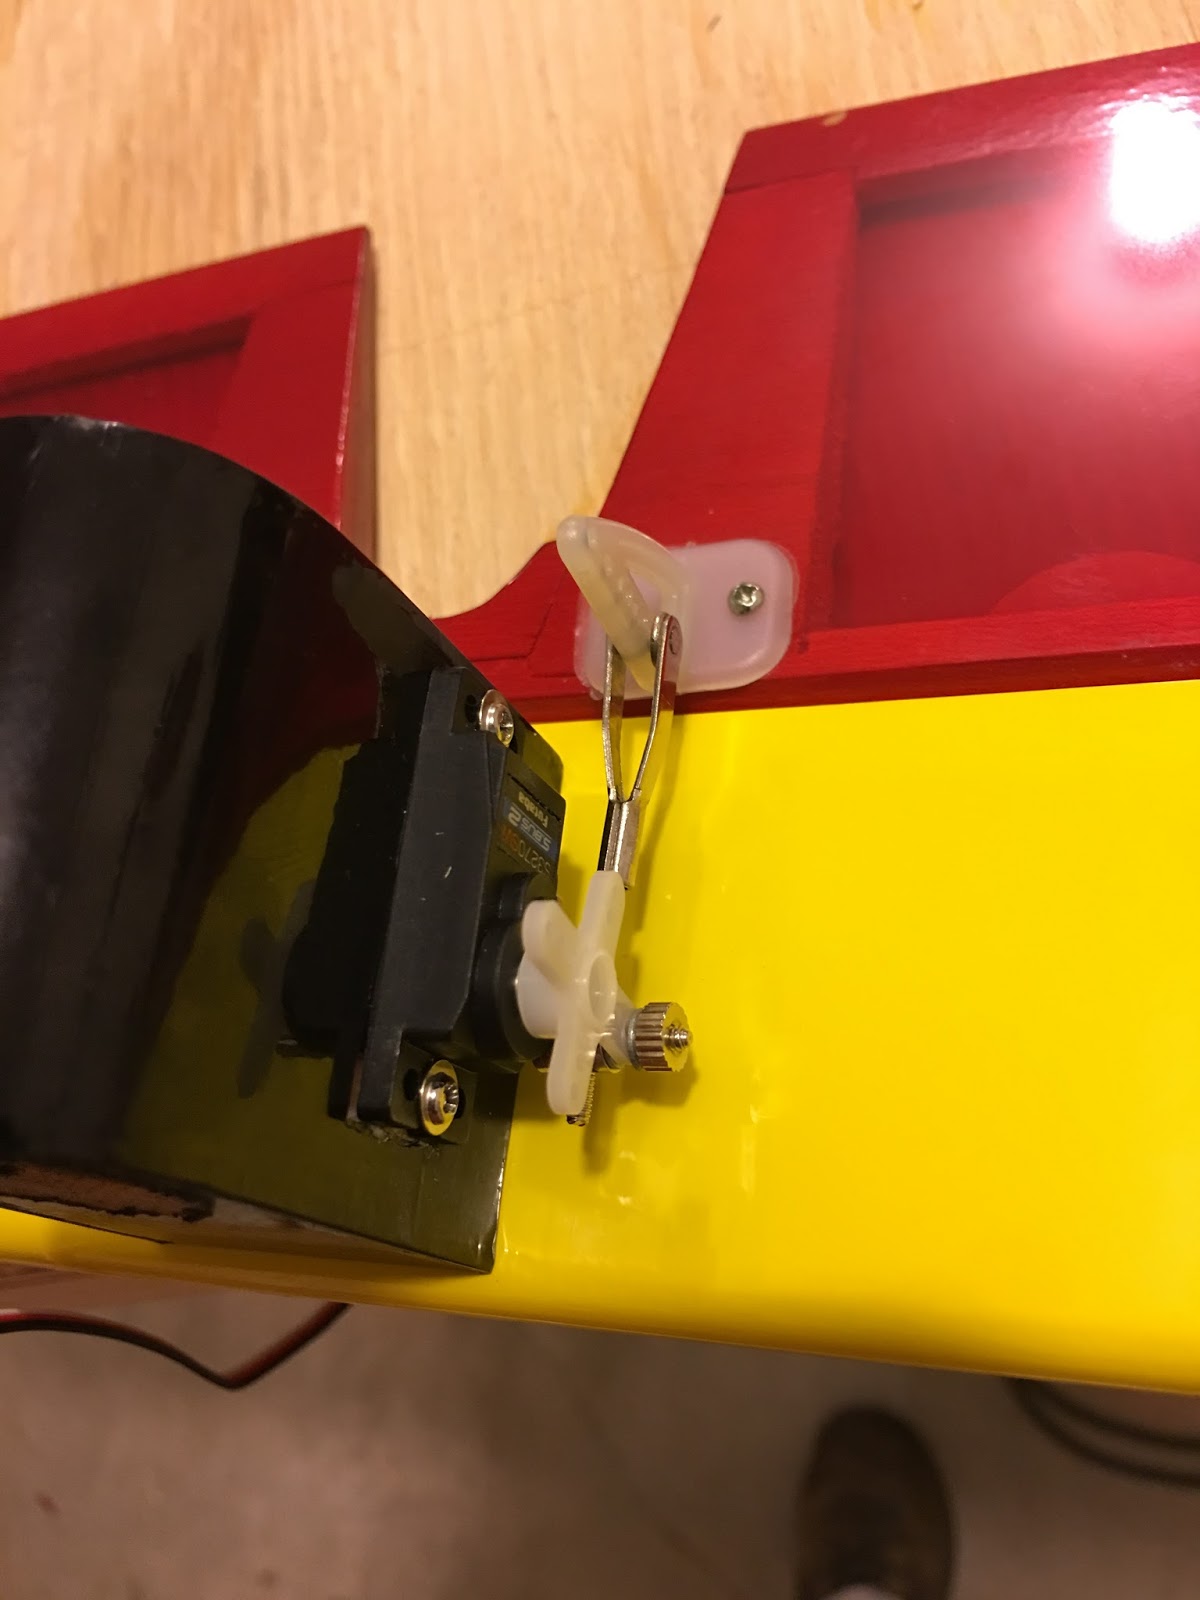
 The linkages provided need to be installed aligned properly and making sure that the holes in the horns coincide with the hinge line. The linkages provided are adequate. Is important to verify there is no play in the linkage.
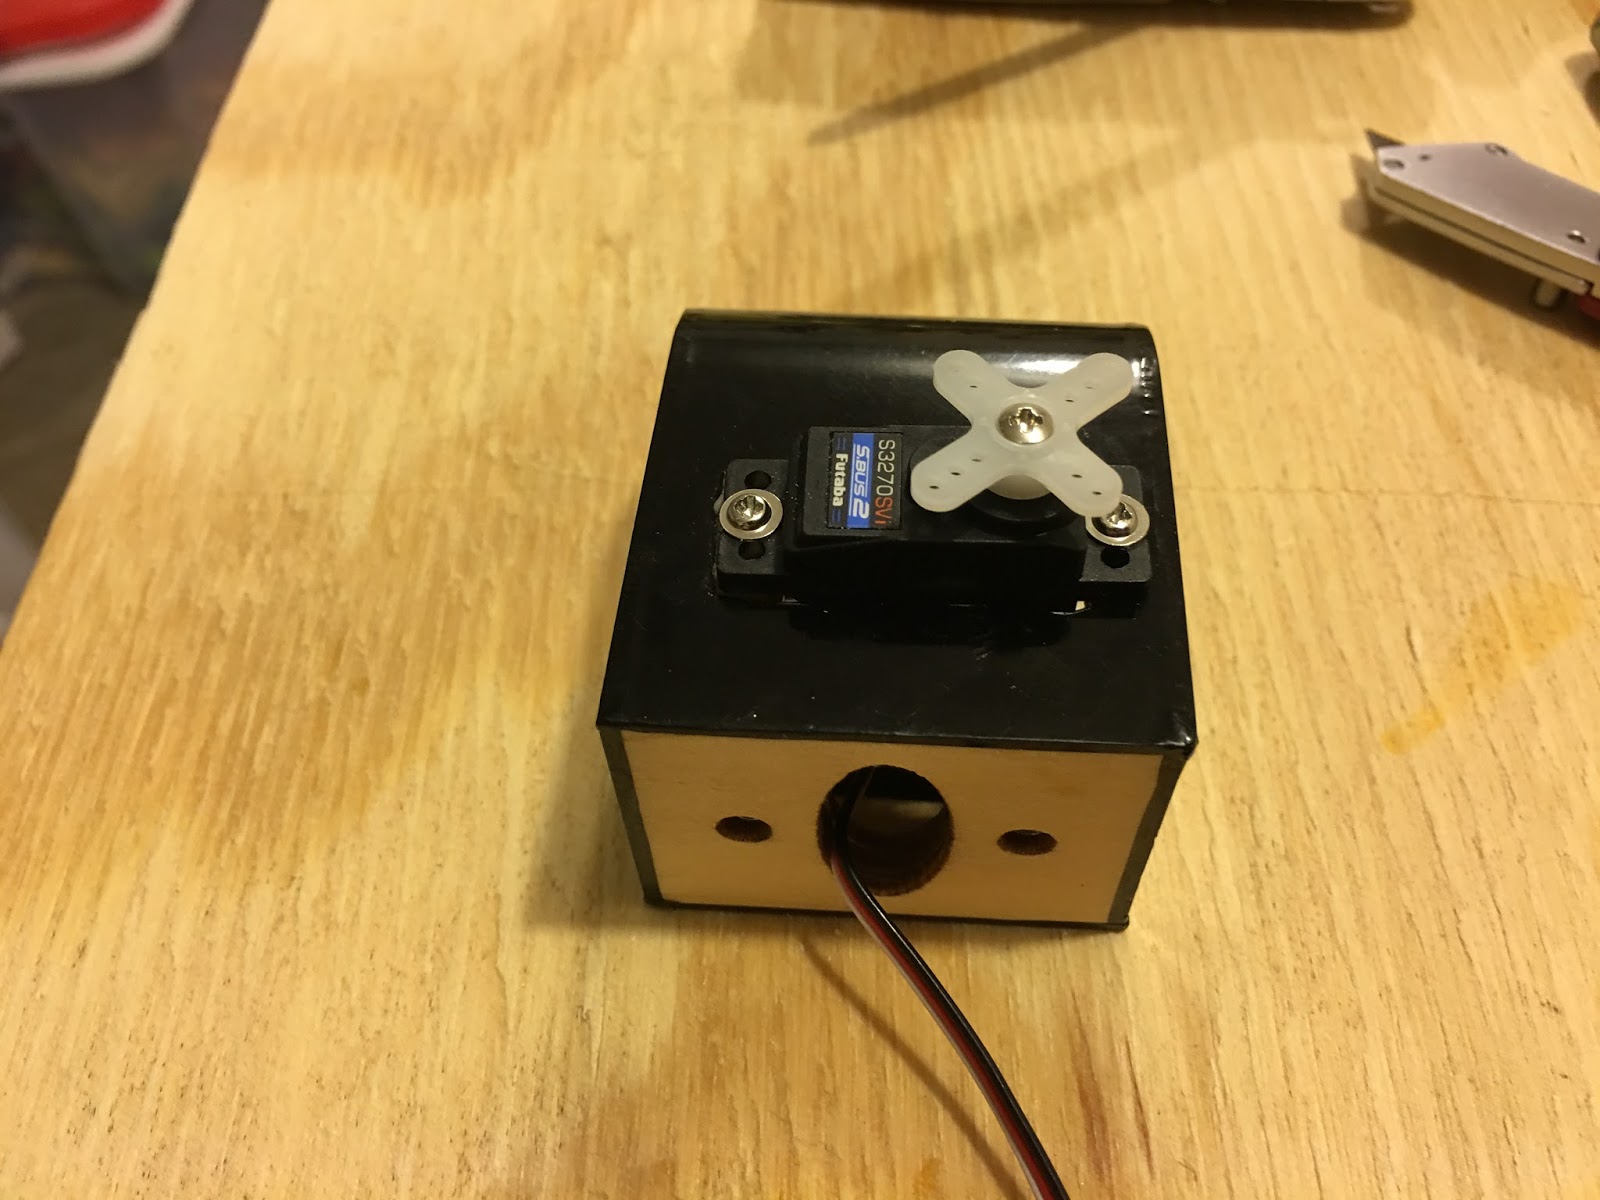
Again is a good idea to mock the installation and make sure that there is a good plan to route the servo cables to the front of the plane.


Here is where HobbyKing's provided hardware simply does not work. Given my servo the linkage is too long.
During this build I have tried to use the items provided exclusively but this is when I reached a stoping point. Given my servo I could not make this work. unless I moved the control horns way back. (which should have worked but I've always been told to keep the horn holes aligned with the hinge line)

 Digging in my hardware left overs I found this linkage and it saved the day. The threaded rod provided by HobbyKing fits nicely into the linkage stopper.
It was a bit disappointed the provided hardware didn't directly work. But it was not a terrible thing. Those linkages are easily obtainable.


 After the elevator linkage was acceptable I carefully removed it and went back to the task of mounting the horizontal stab cradle on the boom and routing the servo wires.
Initially I simply routed the cables to the back of the boom. Then moved on to gluing the horizontal stab craddle.

The manual suggests using Epoxy but I used Gorilla Glue instead.
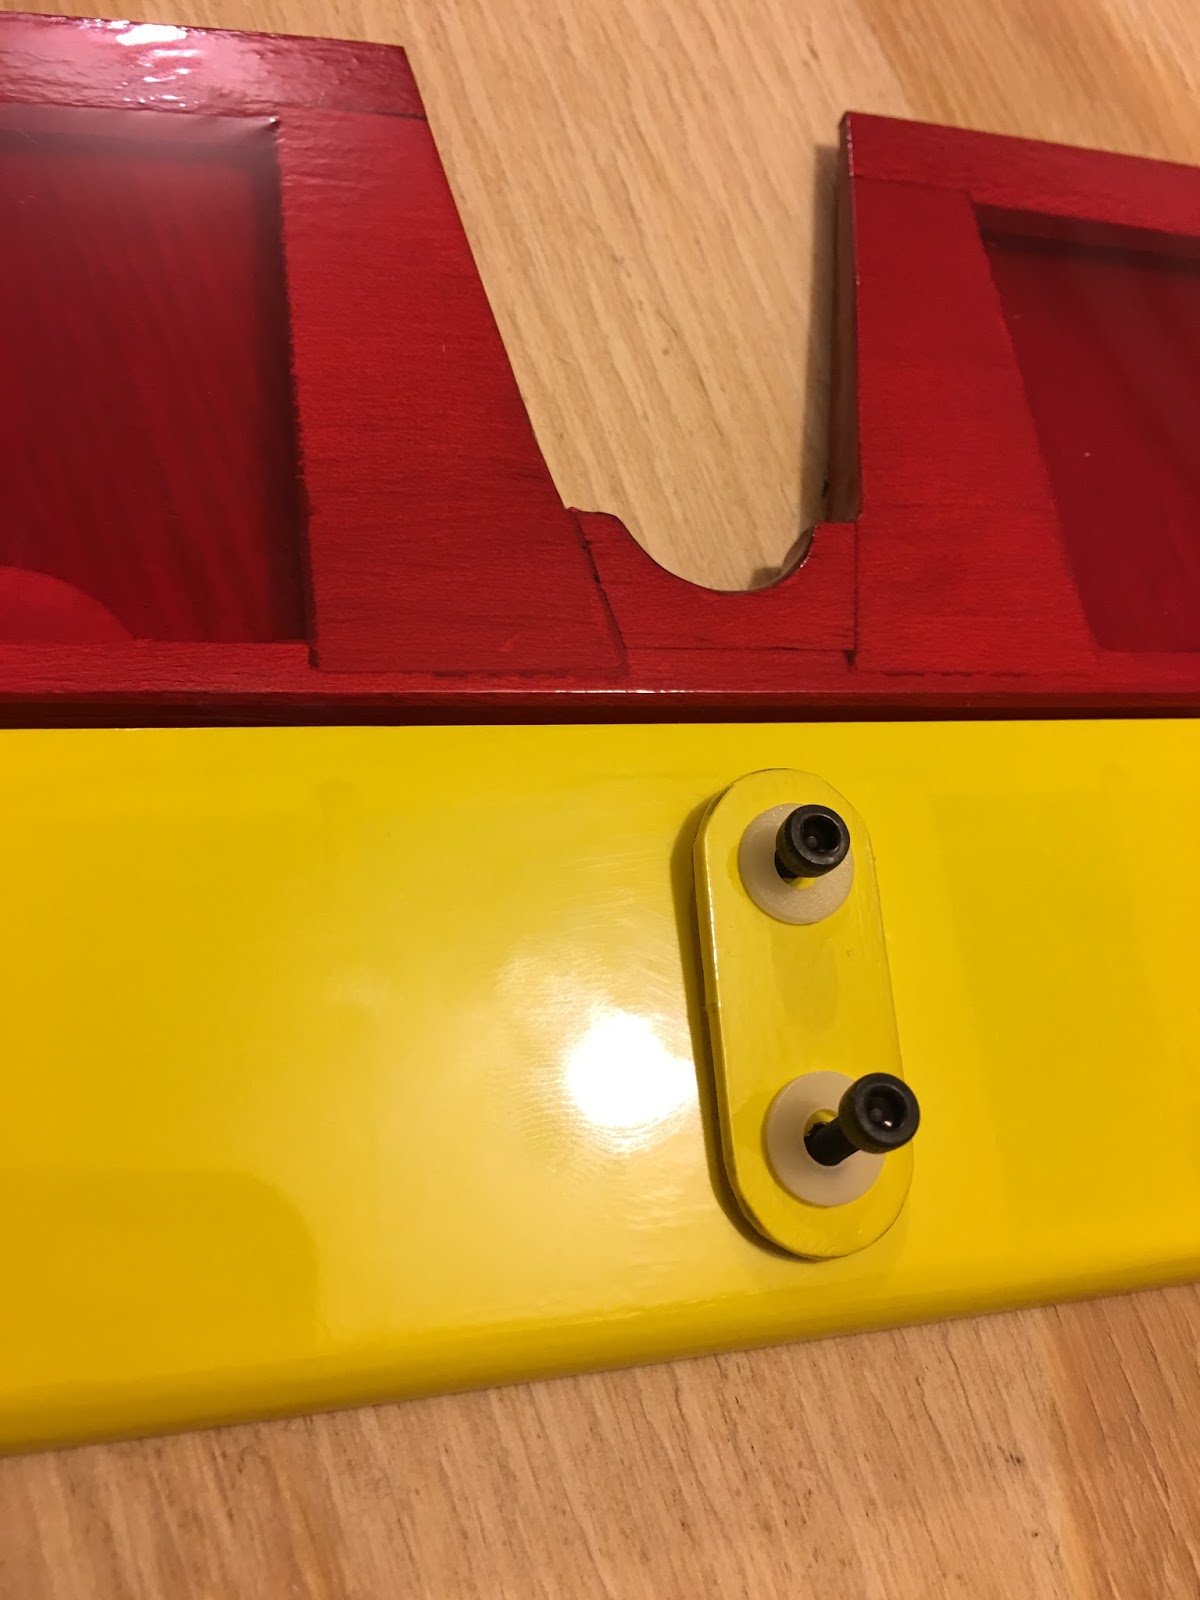
The Vertical stab screws and its concave cradle nicely align the Vertical stab. This is the reference to make the horizontal stab at right angles.


Since I'm using SBUS i attached both servo wires with a Y extension.
After the glue dried I inserted a piece of string with a small weight at the end through the tube (holding it vertically). And then used the string to pull out the extension through the tube to the front.

 Once the servo wires were routed to the front of the plane I reattached all the linkages and tested the tail section controls.
At this point the boom is not yet permanently attached to the pod.
Go to Part 4
Back to Part 2
Back to Part 1
Good post, loved every bit of it, impressed with your dedication to your hobby. Thank you for such a lovely post...
ReplyDelete